NST Getting Started: Difference between revisions
m (Rwh moved page NST 20 Getting Started to NST 20 / 22 Getting Started) |
|
(No difference)
| |
Revision as of 13:58, 2 October 2015

This page describes the basic steps required to get you started using the Network Security Toolkit (NST).
Create Boot Media
Before you can use NST, you will need to create a USB memory stick or DVD to boot from. This involves:
- Downloading an ISO image (or build one from source).
- Transferring the ISO image contents to an USB memory stick or DVD.
- Live booting your computer using the USB memory stick or DVD.
Download ISO Image
You can find free 32 bit pre-built NST ISO images at the NST team's SourceForge project page using the link below:
https://sourceforge.net/projects/nst/files/NST/
You might be able to find pre-built NST ISO images elsewhere on the Internet. These other sources may offer the same or customized builds of the NST ISO image. For example, the NST Pro site (run by the NST team) offers both 32 bit and 64 bit pre-built ISO images.
Prepare Boot Media
Once you have a NST ISO image, you will need to transfer it to a USB memory stick (recommended) or DVD in order to boot a non-virtual system (if you plan to run NST within a virtual environment, you can use the ISO image directly). The Copying ISO Images To USB page and Fedora's: How to create and use Live USB provide extensive details on the preparation of USB media.
Copy ISO Image to USB
For Linux and Mac users, you can use the dd command line utility to simply copy the ISO image directly to USB media. See the Copying ISO Images To USB page for more details. While this method is easy and reliable, it consumes the entire contents of your USB memory stick (unused space is wasted).
Create Live USB Image
The liveusb-creator tool, which is available for both Linux and Windows systems, can be used to create a bootable USB memory stick. This method has many nice features and is highly recommended. However, we have come across a few systems that have difficulty in booting from media prepared this way that will boot from USB media prepared using the dd method.
Burn ISO Image To DVD
If you have a system that refuses to boot from USB media, you can burn the ISO image to a DVD and boot from DVD. We typically recommend against using DVD when possible as it tends to be much slower than USB. You can find software and instructions for burning ISO images to disks for Linux, Windows and Mac based systems (add links - not instructions).
Boot
There are two ways to boot and use NST. A live boot, allows you to try out NST or use it for temporary rescue and analysis situations. A live boot has several limitations, but allows you to run NST without modifying your system. If you find NST to be useful, you will want to perform a full hard disk installation. Once installed to a hard disk, the NST will work like a typical Linux system - except that you will have a plethora of tools available to you through the comfort of your web browser.
Live Boot and Use
When booting from your live media (DVD or USB stick), you should see a boot screen similar to the following:
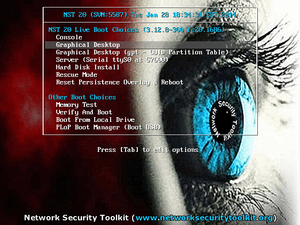
If you don't press a key, the Graphical Desktop mode will boot by default. Use the arrow keys to choose one of the other modes (we recommend Console mode for systems with limited amounts of resources).
Live Boot and Install
From the live boot screen, select the Hard Disk Install boot option. After a few moments (depending upon the speed of your hardware), you should be taken to the hard disk installation screen shown below.
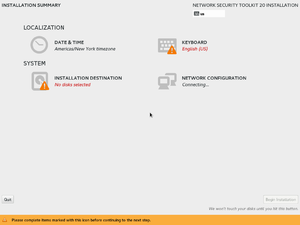
From this point, you should be able to proceed with the NST 20 Hard Disk Installation.
You do not need to boot directly to a hard disk installation. You can start a hard disk installation from a icon you find on the desktop or by using the nstliveinst script from the command line.
Hard Disk Boot
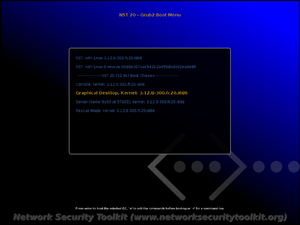
After a successful hard disk installation, you will see the following boot screen.
Log In
When booting in Graphical Desktop mode, you will see the following login screen:
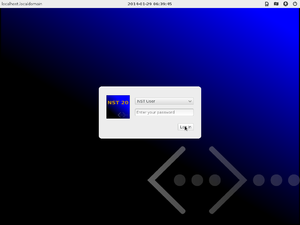
There is no password initially set, so you can simply click on the Log In button to log into the system.
Default Users/Passwords
The NST has two primary user accounts nst and root. You can log in using either of these accounts. Initially, these accounts do not have any passwords associated with them (just press the Enter key or leave the password field blank). Since the NST has no passwords set by default, both the sshd and httpd services are initially disabled. You will not have network access to your NST system out of the box.
Set Passwords
Before the NST system can be used on a network, you must set the passwords for the nst and root accounts. This is done by running the nstpasswd script. You can run this script at the command line, or you can select the Set NST Passwords icon on the desktop.
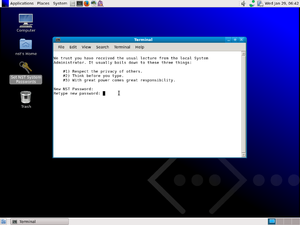
Running the nstpasswd script not only initializes the passwords for the user accounts missing passwords, it also enables the sshd and httpd services so you will be able to remotely access your NST system.
You only need to set the NST passwords one time after a hard disk installation. For live boots you will need to set the NST passwords every time you boot the system (unless you use a persistence layer).
Bring Up the NST Web User Interface
The main advantage of using NST comes from using its Web User Interface (WUI). The WUI provides a wealth of information and immediate access to many tools on the system. You can use the WUI locally on the NST system itself, or access it remotely using any other system on your network that has one of the major browsers (Chrome, Firefox, IE, etc).
To bring up the NST WUI on your NST system, make sure that you have set the NST passwords and then click on the Firefox icon located near the top left of the screen.
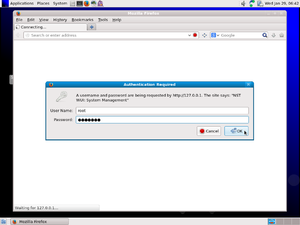
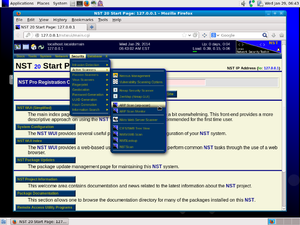
You will be prompted to log in. Enter root as the user ID and the master password that you set. After successfully logging in, you should reach the main page. You will find a menu bar near the top of the page which allows you to quickly jump to many different tools.
Explore
The NST is packed with a lot of tools and information (it can be a bit overwhelming). The following lists a set of tools that require a minimal amount of effort to get you started with.
- HowTo Use The NST WUI arp-scan Page To Quickly Locate Hosts
- NST Network Interface Bandwidth Monitor 2
- Add other trivial tool links here