Getting Started: Difference between revisions
| Line 151: | Line 151: | ||
=== GPT-Labelled Disks (BIOS Boot Partition) - Can Not Boot NST After a Hard Disk Installation === | === GPT-Labelled Disks (BIOS Boot Partition) - Can Not Boot NST After a Hard Disk Installation === | ||
It is known that some '''System BIOS''' cannot boot from a '''GPT-Labelled''' disks (i.e., A BIOS Boot Partition). For details see: '''[http://fedoraproject.org/wiki/Common_F16_bugs#Some_systems.2C_particularly_Apple_Macs.2C_cannot_boot_GPT-labelled_disks Some systems, particularly Apple Macs, cannot boot GPT-labelled disks ]'''. Fedora 16 introduced the ability to boot from a GPT partition. If you encounter a system | It is known that some '''System BIOS''' cannot boot from a '''GPT-Labelled''' disks (i.e., A BIOS Boot Partition). For details see: '''[http://fedoraproject.org/wiki/Common_F16_bugs#Some_systems.2C_particularly_Apple_Macs.2C_cannot_boot_GPT-labelled_disks Some systems, particularly Apple Macs, cannot boot GPT-labelled disks ]'''. Fedora 16 introduced the ability to boot from a GPT partition. If you encounter a system like this then chose the. | ||
= External Access To The NST System = | = External Access To The NST System = | ||
Revision as of 17:09, 28 December 2011
What Files Can I Download And Use?
There are many ways an NST system can be booted. What file(s) you will need to download will depend upon how you intend to use the NST system. A Boot Matrix was created to help you decide on what type of NST install is available.
Full NST Live Distribution
This file contains the full NST distribution and is known as: "NST Live". It is a Live bootable Linux distribution based on Fedora and provides easy access to best-of-breed Open Source Network Security Applications and should run on most x86/x86_64 platforms. One can download this file, burn it to a DVD, boot the DVD and then start using NST.
NST Minimal Live
The size of the full "NST Live ISO" is much larger than can fit on CD media. For those systems that can not boot off of a DVD or a USB flash drive and the intent is to install NST to the system hard drive, use this minimal NST Live ISO. This ISO contains all the necessary files to build the full NST distribution. See the NST Minimal section for installation of a NST Minimal Live ISO.
NST VM Configuration Archive
A Zip archive that contains the configuration files necessary for booting NST Live under VMware Player, Server or Workstation for those folks that want to build their own NST Virtual Machine (VM).
PreBuilt Virtual Machine Archive
A prebuilt Virtual Machine archive that contains the full NST distribution which can be easily launched using VMware Player, Server or Workstation for those folks that do not want to build their own VM using NST Live.
NST Source Archive
This compressed archive contains the entire source tree used to build the NST distribution.
NST Web Site Documentation
This compressed archive contains a snapshot of the NST web site at the time of the distribution release.
NST PDF Documentation
This compressed archive contains a snapshot of the NST documentation in PDF format at the time of the distribution release.
What Can I Do With The NST Live ISO Image?
Burn NST Live To DVD
After downloading the NST Live ISO from SourceForge, one can burn the ISO to DVD media with the linux utility: "growisofs" as show below:
One can verify the ISO DVD integrity from methods found on the DVD md5sum page.
Create A Bootable NST Live USB Flash Drive
One can create an NST Live USB boot installation using Fedora's Live USB Creator utility. This allows one to boot NST Live from a system capable of booting from USB media. Creating the NST Live USB installation can be done from either the Linux or Windows operating system (See: liveusb-creator for a Windows install). This section will explain how to create an NST Live USB boot flash drive from a running instance of NST Live (See: How to create and use Live USB at the Fedora Wiki site for additional information).
First, a couple of prerequisites are needed. You must be running from an NST Live instance (i.e., when you boot NST Live from DVD media) OR you must be running on a system that has both the liveusb-creator command and access to the NST ISO image file or NST DVD. The USB flash drive should have 2GB or more of storage space. The file system on the USB flash drive must be: "vfat" (standard for almost all off-the-shelf USB flash drives).
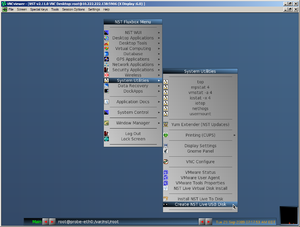
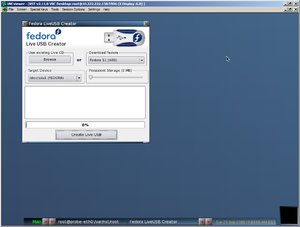
If you are using the Fluxbox desktop manager, Plug in your USB flash drive. From the NST Fluxbox menu navigate to the "System Utilities" menu entry as shown in the "NST Fluxbox Menu" screen shot below. Next select the "Create NST Live USB Disk" menu entry to launch the "Fedora Live USB Creator" utility. The Target Device must be associated with the USB flash drive you plugged in.
 |
 |
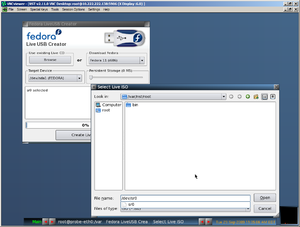
The next step is a little tricky. Use the Browse button in the "Use existing Live CD" section to enter the source for NST Live. This is done by entering the name of the device running NST Live (i.e., typically this is the first DVD device on your system: "/dev/sr0") in the "File name:" entry text field. This is shown in the "Set Source Device For NST Live" screen shot below.
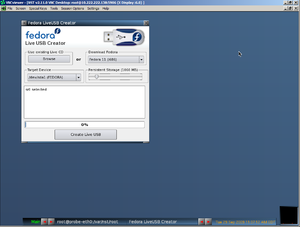
Lastly, the size of your Persistence Data should be now set. Use the slider widget below the "Persistence Storage" section to select a value around 1GB (depending upon the amount of space on your thumb drive). Persistence Data allows one to preserve NST Live data between system reboots and/or system moves.
 |
 |
You are now ready to perform the creation of an NST Live USB flash device. Use the "Create Live USB" button to start the installation. ***Note: If there was already a previous NST Live install on the USB flash drive you will be notified to erase it before the new install can proceed.
***Note: If you are logged into the GNOME desktop manager, the steps are similar. Look under Applications then under System Tools for the Fedora LiveUSB Creator utility.
***Note: We've found that some of the newer versions of the "Fedora Live USB Creator" utility will fail when trying to read directly from "/dev/sr0". If you run into this condition, you will need to revert to using the command line. See the "How do I create a USB Live memory from the command line after booting the NST DVD?" section in the NST USB FAQ for details.
Boot It Under VMware
Booting The System
Console
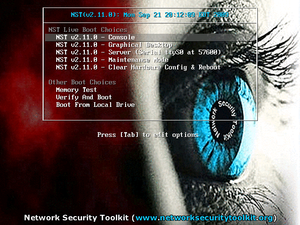
The text based console interface is the default boot more for NST Live. If you don't type anything, your NST Live system should automatically boot in this mode. To skip the delay, simply press the Enter Key while the "Console" boot option is highlighted.
Graphical Desktop
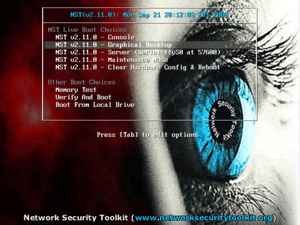
If you'd prefer to use a graphical Fluxbox or GNOME desktop, use the down arrow key to select the "Graphical Desktop" option and press the Enter Key on the screen below:
Server (Serial Console)
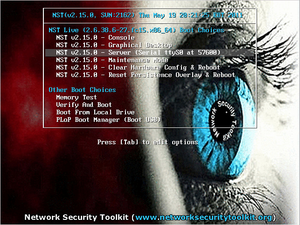
When using NST on a server that has no attached keyboard or monitor, one can use the "Server (Serial ttyS0 at 57600)" option. A serial console for boot up diagnostic output and user login will be available on the server's first COM port: ttyS0. Additional information on using serial ports for user login can be found here: Serial Console - NST 2.x.x.
After Booting
 Default Password
The default password is: nst2003.
Here are some things to be aware of related to the NST system passwords:
- Network access to your NST system will be disabled until you change the default password (the sshd and https services will not be running).
- You should use the nstpasswd command after logging in to change the default password. This changes not just the root password, but many other password entries and enables the sshd and https services.
- You will need to run the nstpasswd command each time you boot NST Live without a persistence overlay.
- If you boot NST Live with a persistence overlay (for example from a USB drive), you will only need to run the nstpasswd command the first time you boot the system and each time you boot the system after clearing your persistence layer.
- If you boot NST from a full installation, you will only need to run the nstpasswd command the first time you log into the system.
 For NST Live Usage
- Login as the root user with the initial default password of nst2003
- Run nstpasswd to change the default system passwords (this will also enable the sshd and httpd service).
 To Install To Hard Disk
Console Mode
- Login as the root user.
- Run the command: nstliveinst -i (run nstliveinst -H to get more information about the nstliveinst command).
- Step through the panels and specify your preferences for the new installation.
- Shutdown and reboot the system (remove the NST Live DVD before rebooting).
- Login and run the nstpasswd command to reset the system passwords.
Graphical Desktop
If your system has at least 512MB of RAM installed, it should be possible to perform a installation after logging into the GNOME desktop.
- Login as the Live System User or root user using the default password of nst2003.
- Double click on the Install icon on the desktop. If this fails to bring up the installer, it is likely your system does not have enough RAM to perform a graphical installation.
- Step through the panels and specify your preferences for the new installation.
- Shutdown and reboot the system (remove the NST Live DVD before rebooting).
- Login and run the nstpasswd command to reset the system passwords.
Text Mode
For a headless server (i.e., One without a graphics card and/or monitor) one can perform a text mode NST hard disk installation.
- Login as the root user.
- Run the command: nstliveinst -a " --text" (run nstliveinst -H to get more information about the nstliveinst command).
- Step through the panels and specify your preferences for the new installation.
- The last panel will ask yout to Reboot the system (remove the NST Live DVD before rebooting).
- Login and run the nstpasswd command to reset the system passwords.
GPT-Labelled Disks (BIOS Boot Partition) - Can Not Boot NST After a Hard Disk Installation
It is known that some System BIOS cannot boot from a GPT-Labelled disks (i.e., A BIOS Boot Partition). For details see: Some systems, particularly Apple Macs, cannot boot GPT-labelled disks . Fedora 16 introduced the ability to boot from a GPT partition. If you encounter a system like this then chose the.
External Access To The NST System
The key feature of the NST distribution is the ability to remotely manage the NST system using standard networking tools (such as a web browser running on a Windows machine).
Determining The IP Address
In order to connect to a NST system, you will need to determine its IP address. The simplest mechanism to do this is by running the getipaddr command after logging in. This will report the IP addresses of each interface. The getipaddr will report all IP addresses associated with the NST system (including the loopback interface and the IP address the NST system presents to the Internet). You can use the -d option to show just the IP address associated with the default network interface.
[root@probe ~]# getipaddr
192.168.1.131
127.0.0.1
71.68.47.221
[root@probe ~]# getipaddr -d
192.168.1.131
[root@probe ~]#
Enabling sshd and httpd Services
In order to access your NST system remotely, you will need to have the sshd and https services running. When you initially boot the system these services are disabled (otherwise anyone would be able to connect to your NST system using the default password).
In order to change all of the passwords used for remote access and enable the sshd and https services, you can use the nstpasswd command as shown below:
[root@probe ~]# nstpasswd
New NST Password:
Retype new password:
Successfully updated password for 'root' in /etc/shadow
Successfully updated password for 'vpn' in /etc/shadow
Successfully updated password for 'liveuser' in /etc/shadow
Successfully updated password for 'root' in /etc/httpd/conf/htuser.nst
Successfully updated password for 'root' in /etc/BackupPC/apache.users
Successfully updated password for 'root' in /etc/webmin/miniserv.users
Successfully Updated 'authorized_keys' file for 'vpn'
Successfully updated password for 'root' in /root/.ssh
Successfully updated password for 'root' in /root/.vnc/passwd
Successfully updated password for 'root/administrator' in /etc/samba/smbpasswd
Fri Sep 25 07:03:54 2009  NOTE: Interface merge enabled by default
Fri Sep 25 07:03:54 2009  Initializing gdbm databases
Fri Sep 25 07:03:54 2009  Admin user password has been set
Successfully updated password for 'admin' in /var/lib/ntop/ntop_pw.db
Successfully Completed initial password setting - enabling services
openssh-daemon is stopped
Starting sshd:                                             [  OK  ]
httpd is stopped
Starting httpd:                                            [  OK  ]
[root@probe ~]#
NST Web User Interface (WUI)
The NST WUI is a web-based user interface to the NST and can be accessed using a standard web browser (Firefox, Chrome, Safari,and Internet Explorer are known to work). This web interface provides a comprehensive and descriptive front-end to many of the popular open source network security applications. Once determining the IP address of your NST system, you can simply use a URL in the form of https://IPADDRESS/ to connect to the NST system. For example, if you determine the IP address of your NST system to be: 192.168.1.131 you should be able to type: https://192.168.1.131/ into your web browser and connect to your NST system.
You will need to log in when making a connection. Use the login ID of root and the password you specified when you ran the nstpasswd command.
NST Secure Shell Access (ssh, Putty)
After you have determined the IP address of your NST system and run the nstpasswd command, you should be able to connect to your NST system using a secure shell client (ssh, Putty, ...). The following demonstrates how to use ssh to log into a NST system having the IP address of 192.168.1.131 (use the password you specified when invoking the nstpasswd command).
[pkb@rice ~]$ ssh root@192.168.1.131
root@192.168.1.131's password:
Last login: Fri Sep 25 07:03:27 2009 from rice.linux.bogus

================================================
= Linux Network Security Toolkit (NST v2.11.0) =
================================================

[root@dhcp131 ~]#
Maintaining And Updating NST
After installing the system and changing the default password the next thing you will want to do is to grab the available updates. To get the NST system updated using the GNOME Desktop Manager, use the YUM extender (yumex) utility that is located in the menu: Applications -> System Tools -> Yum Extender (NST Updates).
I had to go into the Options menu and check the "Skip Broken" box so that whole process will not break when a package is having problems. Currently the rubygem packages seem to have a problem updating.
Grub2
HowTo Remove The NST Splash Screen On The Grub2 Command Line
Sometimes it may be necessary to edit an NST Grub2 boot entry. For better character contrast on the screen, one can remove the NST Grub2 splash image using the follow procedure:
- Boot into the NST Grub2 Boot Loader Menu.
- Type "c" to enter the Grub2 command line mode.
- Enter this Grub2 command: background_image <cr> ***Note: You can use the <tab> key for command completion (e.g., bac<tab>).
- Hit the <Esc> key to return to the NST Grub2 boot menu for editing.