HowTo Geolocate ntop Data: Difference between revisions
| Line 25: | Line 25: | ||
=== '''HTTP/HTTPS Access''' === | === '''HTTP/HTTPS Access''' === | ||
Access to the '''[http://www.ntop.org ntop]''' user interface can be configured to use either the '''HTTP''' and/or the '''HTTPS''' protocol. This is done by setting a non-zero '''Port''' value for the associated protocol. | Access to the '''[http://www.ntop.org ntop]''' user interface can be configured to use either the '''HTTP''' and/or the '''HTTPS''' protocol. This is done by setting a non-zero '''Access Port''' value for the associated protocol. An access port value of '''Zero (0)''' will disable the use of the protocol. Typically, an access port value of '''3000''' is used for '''HTTP''' and an access port value of '''3001''' is used for '''HTTPS'''. | ||
=== Setup ntop Options === | === Setup ntop Options === | ||
Revision as of 14:12, 16 September 2010
Overview
This HowTo explains the procedure for setting up an ntop session and producing on demand host geolocations rendered on either a Mercator World Map projection or on a KML Earth Browser such as Google Earth, Google Maps or Marble.
One of the goals of the NST WUI is to provide a web-based front-end to numerous open source network security applications. Trying to build out a web-based interface that has a common look-and-feel across the vast spectrum of applications is a daunting task. Once an NST WUI interface is mastered, it will become a routine task for the network security administrator to use it across different NST systems and network infrastructure environments.
Before diving into producing ntop Hosts Geolocations, one needs to understand best practices on how to setup an ntop session as a Host data source collector. This first involves getting ntop up and running using its NST WUI management interface and then secondly controlling how much data ntop is configured to collect using ntop administrative settings.
ntop Setup Management
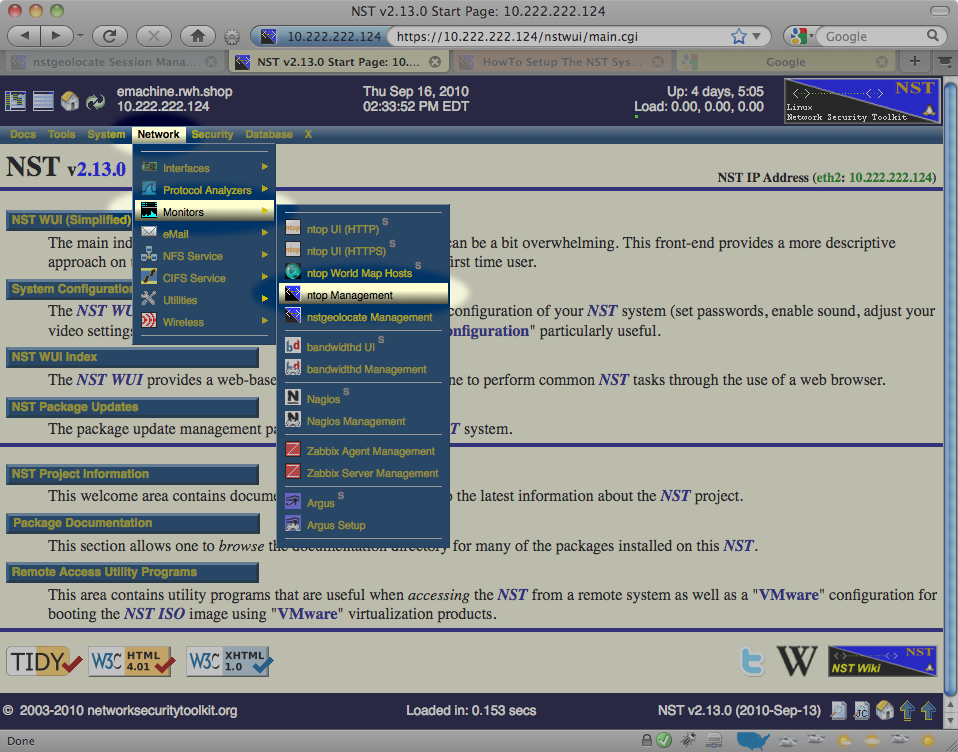
This section describes how to setup an ntop session using the NST WUI. The image below shows one how to locate the ntop Management page using the NST menu bar.

Network Interface(s)
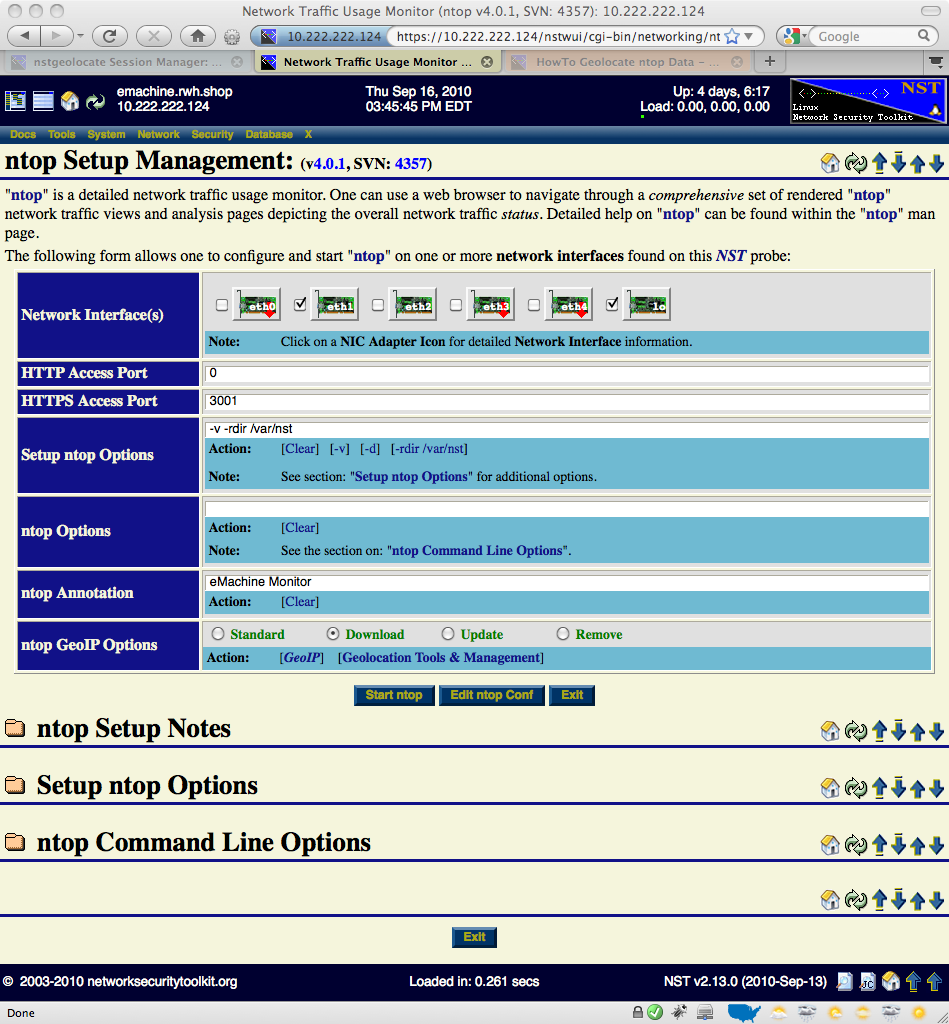
The input and selection fields provided by the NST WUI management interface will be explained so that one can quickly start up ntop. One or more network interfaces can be selected (i.e., click on an associated check box) to be monitored by the ntop application. One can click on a NIC adapter icon to examine detailed counter data and interface controls associated with a network adapter. This feature can be particularly useful if one wants to know if traffic is currently occurring on a network interface prior to bring up the ntop session. For best results when geolocating Hosts using ntop data, select a network interface to monitor that has a public IP Address presence (e.g., Network Tap or SPAN port associated with the dirty side of a corporate firewall or a web server farm located in a DMZ).
A network interface does not have to have a binding IP Address (i.e., stealth interface) and can also be in the Down state. The NST WUI will bring all selected network interfaces from the Down state to the Up state prior to starting the ntop session.
HTTP/HTTPS Access
Access to the ntop user interface can be configured to use either the HTTP and/or the HTTPS protocol. This is done by setting a non-zero Access Port value for the associated protocol. An access port value of Zero (0) will disable the use of the protocol. Typically, an access port value of 3000 is used for HTTP and an access port value of 3001 is used for HTTPS.
Setup ntop Options
The script: "setup_ntop" is used to support the NST WUI by creating a runtime execution environment for ntop and starting up the ntop daemon.

The image above depicts the NST WUI ntop setup management page. Use the following steps to setup an ntop session.
ntop Runtime Management
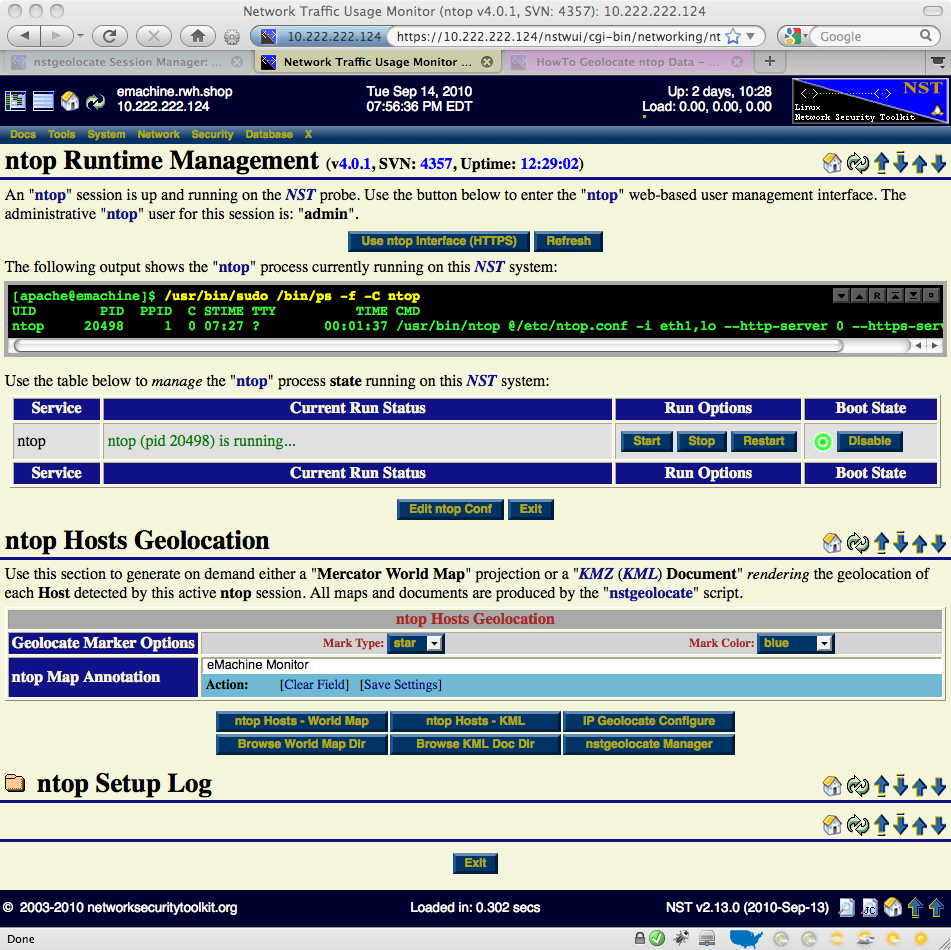
Once an ntop session is up and running, one can now produce on demand host geolocations.
