Getting Started
Contents
What Files Can I Download And Use?
Full NST Live Distribution
This file contains the full NST distribution and is known as: "NST Live". It is a Live bootable Linux distribution based on Fedora and provides easy access to best-of-breed Open Source Network Security Applications and should run on most x86/x86_64 platforms. One can download this file, burn it to a DVD, boot the DVD and then start using NST.
NST Minimal Live
The size of the full "NST Live ISO" is much larger than can fit on CD media. For those systems that can not boot off of a DVD or a USB flash drive and the intent is to install NST to the system hard drive, use this minimal NST Live ISO. This ISO contains all the necessary files to build the full NST distribution. See the NST Minimal section for installation of a NST Minimal Live ISO.
NST VM Configuration Archive
A Zip archive that contains the configuration files necessary for booting NST Live under VMware Player, Server or Workstation for those folks that want to build their own NST Virtual Machine (VM).
PreBuilt Virtual Machine Archive
A prebuilt Virtual Machine archive that contains the full NST distribution which can be easily launched using VMware Player, Server or Workstation for those folks that do not want to build their own VM using NST Live.
NST Source Archive
This compressed archive contains the entire source tree used to build the NST distribution.
NST Web Site Documentation
This compressed archive contains a snapshot of the NST web site at the time of the distribution release.
NST PDF Documentation
This compressed archive contains a snapshot of the NST documentation in PDF format at the time of the distribution release.
What Can I Do With The NST Live ISO Image?
Burn To DVD
Create Bootable USB Thumbdrive
Create_live_to_usb1.png
Boot It Under VMware
Booting The System
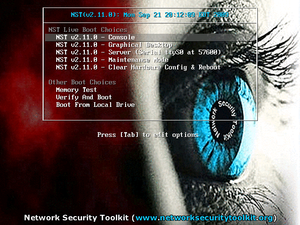
Console
The text based console interface is the default boot more for NST Live. If you don't type anything, your NST Live system should automatically boot in this mode. To skip the delay, simply press the Enter Key while the Console boot option is highlighted.
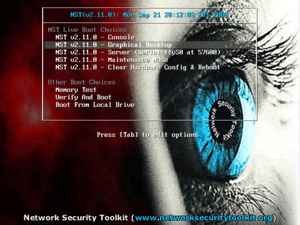
Graphical Desktop
If you'd prefer to use a graphical Fluxbox or GNOME desktop, use the down arrow key to select the Graphical Desktop option and press the Enter Key on the screen below:
After Booting
 Default Password
The default password is: nst2003.
Here are some things to be aware of related to the NST system passwords:
- Network access to your NST system will be disabled until you change the default password (the sshd and https services will not be running).
- You should use the nstpasswd command after logging in to change the default password. This changes not just the root password, but many other password entries and enables the sshd and https services.
- You will need to run the nstpasswd command each time you boot NST Live without a persistence overlay.
- If you boot NST Live with a persistence overlay (for example from a USB drive), you will only need to run the nstpasswd command the first time you boot the system and each time you boot the system after clearing your persistence layer.
- If you boot NST from a full installation, you will only need to run the nstpasswd command the first time you log into the system.
 For NST Live Usage
- Login as the root user with the initial default password of nst2003
- Run nstpasswd to change the default system passwords (this will also enable the sshd and httpd service).
 To Install To Hard Disk
Console Mode
- Login as the root user.
- Run the command: nstliveinst -i (run nstliveinst -H to get more information about the nstliveinst command).
- Step through the panels and specify your preferences for the new installation.
- Shutdown and reboot the system (remove the NST Live DVD before rebooting).
- Login and run the nstpasswd command to reset the system passwords.
Graphical Desktop Session
- Login as the Live System User or root user using the default password of nst2003.
- Double click on the Install icon on the desktop.
- Step through the panels and specify your preferences for the new installation.
- Shutdown and reboot the system (remove the NST Live DVD before rebooting).
- Login and run the nstpasswd command to reset the system passwords.
External Access To The NST System
The key feature of the NST distribution is the ability to remotely manage the NST system using standard networking tools (such as a web browser running on a Windows machine).
Determining The IP Address
In order to connect to a NST system, you will need to determine its IP address. The simplest mechanism to do this is by running the getipaddr command after logging in. This will report the IP addresses of each interface. The getipaddr will report all IP addresses associated with the NST system (including the loopback interface and the IP address the NST system presents to the Internet). You can use the -d option to show just the IP address associated with the default network interface.
[root@probe ~]# getipaddr
192.168.1.131
127.0.0.1
71.68.47.221
[root@probe ~]# getipaddr -d
192.168.1.131
[root@probe ~]#
Enabling sshd and httpd Services
In order to access your NST system remotely, you will need to have the sshd and https services running. When you initially boot the system these services are disabled (otherwise anyone would be able to connect to your NST system using the default password).
In order to change all of the passwords used for remote access and enable the sshd and https services, you can use the nstpasswd command as shown below:
[root@probe ~]# nstpasswd
New NST Password:
Retype new password:
Successfully updated password for 'root' in /etc/shadow
Successfully updated password for 'vpn' in /etc/shadow
Successfully updated password for 'liveuser' in /etc/shadow
Successfully updated password for 'root' in /etc/httpd/conf/htuser.nst
Successfully updated password for 'root' in /etc/BackupPC/apache.users
Successfully updated password for 'root' in /etc/webmin/miniserv.users
Successfully Updated 'authorized_keys' file for 'vpn'
Successfully updated password for 'root' in /root/.ssh
Successfully updated password for 'root' in /root/.vnc/passwd
Successfully updated password for 'root/administrator' in /etc/samba/smbpasswd
Fri Sep 25 07:03:54 2009  NOTE: Interface merge enabled by default
Fri Sep 25 07:03:54 2009  Initializing gdbm databases
Fri Sep 25 07:03:54 2009  Admin user password has been set
Successfully updated password for 'admin' in /var/lib/ntop/ntop_pw.db
Successfully Completed initial password setting - enabling services
openssh-daemon is stopped
Starting sshd:                                             [  OK  ]
httpd is stopped
Starting httpd:                                            [  OK  ]
[root@probe ~]#
NST Web User Interface (WUI)
The NST WUI can be accessed using a standard web browser (Firefox, Chrome, and Internet Explorer are known to work). After determining the IP address of your NST system, you can simply use a URL in the form of https://IPADDRESS/ to connect to the NST system. For example, if you determine the IP address of your NST system to be: 192.168.1.131 you should be able to type: https://192.168.1.131/ into your web browser and connect to your NST system.
You will need to log in when making a connection. Use the login ID of root and the password you specified when you ran the nstpasswd command.
NST Secure Shell Access (ssh, Putty)
After you have determined the IP address of your NST system and run the nstpasswd command, you should be able to connect to your NST system using a secure shell client (ssh, Putty, ...). The following demonstrates how to use ssh to log into a NST system having the IP address of 192.168.1.131 (use the password you specified when invoking the nstpasswd command).
[pkb@rice ~]$ ssh root@192.168.1.131
root@192.168.1.131's password:
Last login: Fri Sep 25 07:03:27 2009 from rice.linux.bogus

================================================
= Linux Network Security Toolkit (NST v2.11.0) =
================================================

[root@dhcp131 ~]#

